Week 6 - Tutorial
Continuing from the scene I just added lighting and post processing effects to (see Week 5 Self Study), I have now added a variety of camera styles to give the scene a more impressive, professional feel using the plugin Cinemachine!
Above is a demonstration of a 3rd person chase cam, following the player character as he walks around. While it is possible to achieve a similar result by attaching the camera object to the character object, using a Cinemachine virtual camera, we can do much more. Note that a virtual camera is unique to the Cinemachine plugin, and is not the same as the normal camera which already exists in Unity. These virtual cameras have a whole range of options to allow for fine customisation to achieve what ever effect you want. For example, you may notice that the view does not follow the character's orientation rigidly, instead gradually floating around as the player turns - something not possible without a lot of hassle if you were to simply attach a camera to the character.
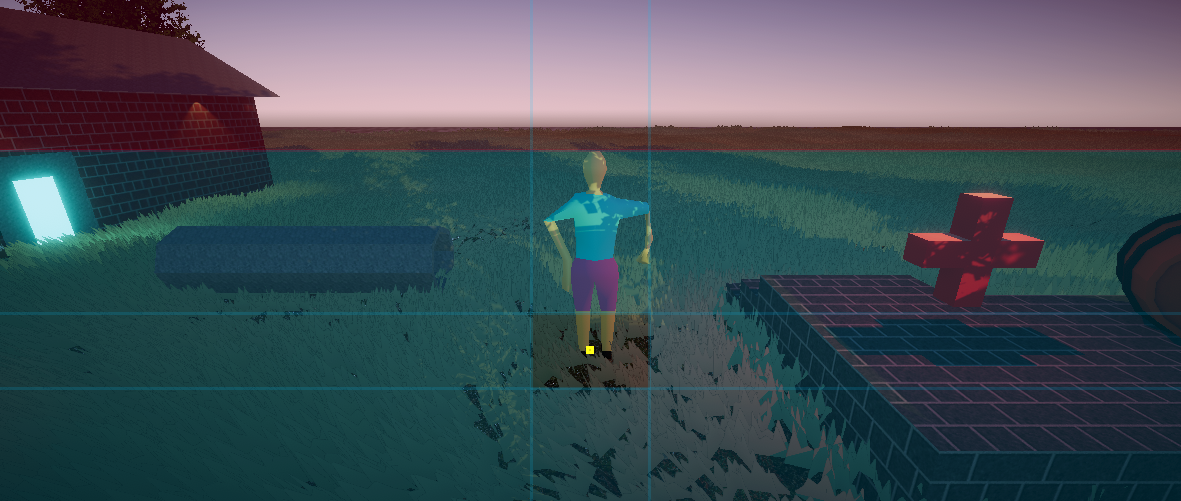
In the screenshot above, you can see the window guides which Cinemachine helpfully paints onto the screen. These guides reflect some of the current settings you have applied to your virtual camera - namely the horizontal and vertical "deadspace" settings. The deadspace refers to the area within the object being focussed on can move before affecting the camera's view (in this case, the deadzone is represented by the uncoloured part of the screen near the middle bottom). As long as that yellow dot (which represents what the camera is focussing on) stays within that uncoloured space, the camera will not pan around - that only happens once the yellow dot has moved enough to enter the blue areas. As the character moves, so does the yellow dot - meaning that the camera will only start panning once the player has move over far enough, making for a smoother viewing experience as opposed to having your view jerked around.
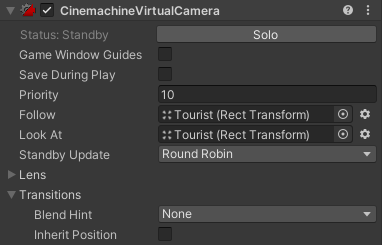
As mentioned above, the camera is focussing on the player - but it's also following the player object as it moves around the scene. The screenshot above shows the "Follow" and "Loot At" fields set to the character object (called "Tourist"), which reflect both of these behaviours.
The demo above shows 2 interesting things. Firstly, there is a smooth transition from one camera view to another, and secondly, a new style of camera which follows a dolly track. When the player walks into an invisible trigger zone, an inactive virtual camera is activated, causing the view to smoothly transition from the normal 3rd person chase camera (virtual camera 1) to the new camera following the dolly track (virtual camera 2). Various settings exist for transitions, such as soft transitions in and out (which is the setting used above), soft in (smoothly transitions when changing to but not from), soft out (vice versa), and hard cuts (jumps to new view immediately) among others.
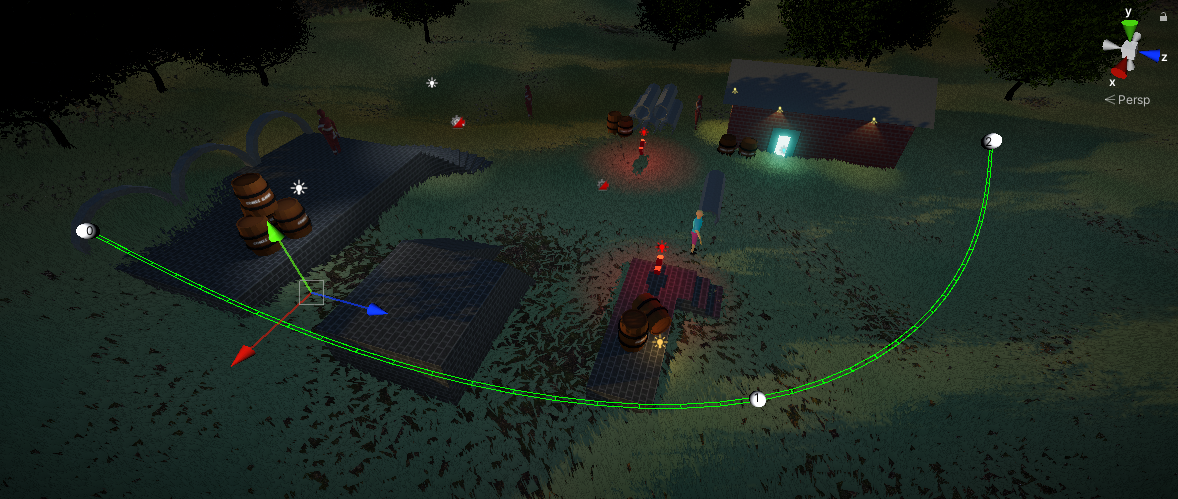
As the player starts to ascend the stairs, the view is changed to a sort of side-on perspective with the camera seemingly moving along one axis. This effect is achieved using a dolly track, which is essentially a path that the camera's movement is restricted to. Setting up this track is very intuitive and easy; all you need to do is define the different points of the track in world coordinates and choose your desired setting for fine tuning. For example, you can see in the picture above that the track consists of 3 points (the white circles), and the path (represented in green) curves smoothly from one point to the next, rather than having sharp corners. Once this track is defined, you only need to tell the virtual camera to use it!
The demo above shows the third and final camera style, the area group camera. This style of camera manipulates the panning and zoom levels in order for a given group of objects to remain the shot consistently. In this case, the group consists of the player character and 3 separate enemy objects - meaning the camera will try to ensure that all of these objects are in the shot at all times, even as they move around the scene or are destroyed. Various setting exist such as minimum and maximum field of view (essentially how much of the scene can be shown at once), zoom settings, vertical and horizontal offsets, and more. In the demo above, I set the minimum field of view to 20 (otherwise it was too zoomed in to make anything out), and messed around with the vertical offset just enough to make sure the camera wasn't pointing at the ground as much.
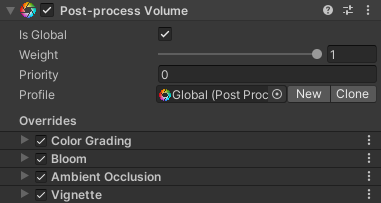
In my previous post I briefly touched on post processing effects - and above is the full list of active effects in my scene. The bloom, ambient occlusion and colour grading are all still present - just with a few minor tweaks to the settings. However, I decided to add a vignette as my fourth effect, which is responsible for creating that subtle dark shadow around the edge of the screen (it's a bit difficult to spot in the terrible quality gifs). This gives the scene a nice cinematic feel, and it's probably better that the effect is more subtle than overt, as it might end up feeling intrusive or hide too much from the player's vision.
Here's a quick summary of what the other effects do:
- Colour Grading - allows you to manipulate the overall appearance of your scene by messing around with how colours are displayed. I'm not very good at using this effect, and achieving perfect colour grading can be an artform in itself - extending far beyond game development and into the realms of photography, image manipulation, etc.
- Bloom - responsible for adding the soft glowing effect to light sources. Pretty easy to use - probably too easy, as you can definitely overdo bloom effects (in most games I turn it off because it's so annoying).
- Ambient Occlusion - casts shadows on surfaces according to how close objects are together. Think of the edge of a room where two walls meet, or where the walls meet the ceiling in the corners. Ambient occlusion can add some shadows to make these edges and corners look nicer, and can bring a satisfying sense of depth to the scene.
So far, these post processing effects are being applied globally - meaning that they are always on and visible. The demo above shows an example of a post processing effect which is not global. Here the player walks into an invisible trigger box behind the house; upon entry, a new Colour Grading effect is being applied in addition to the global ones. In this case, the exposure is being turned down, resulting in a spooky darkness taking hold of the player's view. This was surprisingly easy to implement, as all that's needed is a new post processing "volume". A volume is essentially an application of effects, for example all those global effects are a part of one particular post processing volume, whereas the non-global one is part of a totally separate volume. This makes it pretty easy to reuse effects in multiple situations, and is handy for organisation purposes.
Leave a comment
Log in with itch.io to leave a comment.